Adding people and setting roles
Adding people
Primary owners, owners, and admins can add people to the account. To add a new person to your Equals account, go to the “People” page of your account. At the top of this page, you’ll see a button that says “+ Add People”.

Once you click on this, you’ll be asked to add some information about the person you wish to add. We’ll need to know their name, email address and you’ll need to assign them an account role.
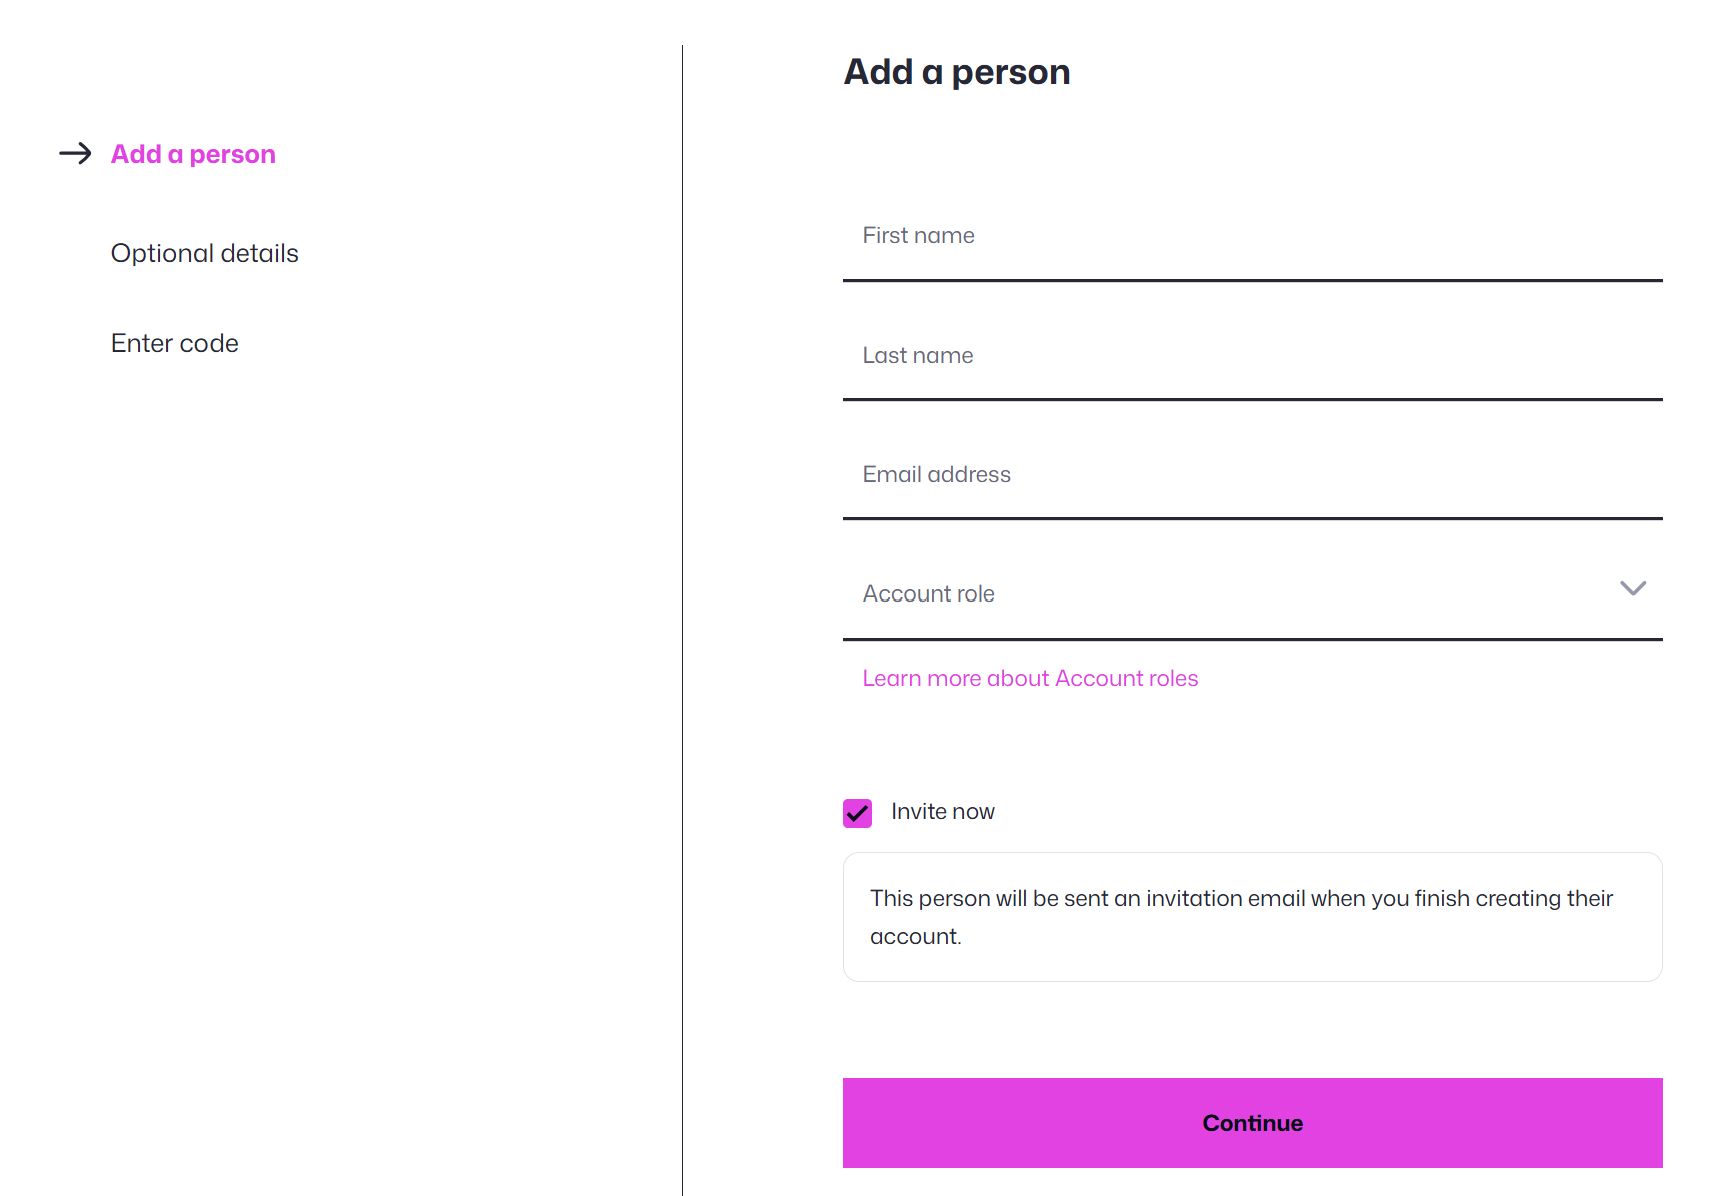
Assign a role
Primary Owner
- Every company account must have one active Primary Owner
- The Primary Owner cannot be deactivated
- This role can only be transferred to another active Owner by the current Primary Owner
Owner
- Owners have full view and edit access to all features
- Can manage Account settings, including enabling or disabling features
Admin
- Admins have view and edit access to all platform features
- They can view but not edit Account settings
Payer
- Payers can add recipients and make payments
- They do not have access to Account settings or permissions
Viewer
- Viewers have view-only access to all areas of the platform (except Account settings)
- They cannot make changes or transactions
Accountant
- Accountants have view and edit access to:
Spending activity, including statements and transactions
Annotations and Integrations in Account settings
You can assign one of the following roles: - They cannot be issued an Individual card
User
- Users can be assigned to an Individual card
- They have no access to account-level features
- They cannot make payments
Role structure suggestion
Here’s how many of our customers typically assign roles within their teams:
- Owner: High-level executives or C-suite leaders
- Admin: Senior finance staff
- Payer: Finance or Payments team members
- Viewer: Consultants or finance staff responsible for reporting
- Accountant: A third party accountant
- User: Individual contributors who need to use cards for spending
You should assign roles in a way that best suits your business. You do not need to use all the roles, you can pick and choose what works for your team.
Roles and permissions
| Permission | Primary owner | Owner | Admin | Viewer | Payer | User | Accountant |
|---|---|---|---|---|---|---|---|
| Can have their access deactivated | ✕ | ✓ | ✓ | ✓ | ✓ | ✓ | ✓ |
| Can allocate another Owner to become the Primary owner | ✓ | ✕ | ✕ | ✕ | ✕ | ✕ | ✕ |
| View people | ✓ | ✓ | ✓ | ✓ | ✕ | ✕ | ✕ |
| Add new people | ✓ | ✓ | ✓ | ✕ | ✕ | ✕ | ✕ |
| Manage existing people (i.e edit account roles, deactivate people) | ✓ | ✓ | ✓ | ✕ | ✕ | ✕ | ✕ |
| Can set-up & manage Xero integration | ✓ | ✓ | ✕ | ✕ | ✕ | ✕ | ✓ |
| Can create new Balances | ✓ | ✓ | ✓ | ✕ | ✕ | ✕ | ✕ |
| View all transactions | ✓ | ✓ | ✓ | ✓ | ✓ | Their own | ✓ |
| Can annotate all card transactions | ✓ | ✓ | ✓ | Their own | Their own | Their own | ✓ |
| Can manage annotation categories & settings | ✓ | ✓ | ✕ | ✕ | ✕ | ✕ | ✓ |
| Can have their own Individual card | ✓ | ✓ | ✓ | ✓ | ✓ | ✓ | ✕ |
| View all Shared cards | ✓ | ✓ | ✓ | ✓ | ✕ | ✕ | ✕ |
| View Shared card full details | ✓ | ✓ | ✓ | ✕ | ✕ | ✕ | ✕ |
| Create new Shared cards | ✓ | ✓ | ✓ | ✕ | ✕ | ✕ | ✕ |
| Create spending limits on Shared cards | ✓ | ✓ | ✓ | ✕ | ✕ | ✕ | ✕ |
| View all Individual cards | ✓ | ✓ | ✓ | ✓ | Their own | Their own | Not applicable |
| Create new Individual cards | ✓ | ✓ | ✓ | ✕ | ✕ | ✕ | ✕ |
| View Individual card full details & PIN | Their own | Their own | Their own | Their own | Their own | Their own | Not applicable |
| Create spending limits on Individual cards | ✓ | ✓ | ✓ | ✕ | ✕ | ✕ | ✕ |
| Block ATM access on cards | ✓ | ✓ | ✓ | ✕ | ✕ | ✕ | ✕ |
| Can add recipients | ✓ | ✓ | ✓ | ✕ | ✓ | ✕ | ✕ |
| Can create orders (outbound wire payments, exchange etc.) | ✓ | ✓ | ✓ | ✕ | ✓ | ✕ | ✕ |
Account role quiz
Use this quiz to help work out the best account role for team members you are adding.
Question 1 of 6
Will this person need to add recipients and make payments (e.g. wire payments, exchanges)?
Send an invite
After choosing a role for the person you're adding, you can decide whether to send the invitation immediately, or wait and send it later.
In most cases, it’s easiest to invite your team member as soon as you add their details. However, you may prefer to delay the invite, for example, until you're onboarding them in person.
On the next screen, you can choose to enter extra information about the person you’re adding:
- Job title
- Employee number
- Work phone number
These details are optional but can help you and your team easily identify users in your account.
Two-factor authentication
For added security, a two-factor authentication (2FA) check is required whenever someone is added to the account. You’ll be asked to enter a verification code that we’ll send to your registered mobile number.
How to send the invite later
If you choose to invite them later:
- Go to the People page
- Select their profile
- Click “Send invite”
The invite email
Your team member will receive an email with the subject line: “You’ve been invited to Equals”
This email includes a link to:
- Set up their password
- Log in and access your account
⚠️ Important:
They must use this email to set up their password. This is the only way they can activate their account and get started. The link will expire in two weeks. If they do not use it in this time, you will need to send them a new link.
Look through more platform walkthroughs


Ready to get started?
Open an account today and put this guide to use right away.